Running the actor
In Getting started you ran an actor from the dashboard UI. Now, we're going to start the actor "the long way" so that you can get a feel for all of the moving parts of the process. Our tooling documentation should help you get actors started more easily, once you've been through this guide.
We assume you've already installed wash, the wasmCloud host, and necessary prerequisites.
Build the actor
Building the actor is as easy as running make in the project's root directory. This will compile the actor and sign it with a freshly generated seed key. The Makefile that comes with the newly generated project lists claims for the actor including wasmcloud:httpserver, so it can work with the HTTP Server capability provider.
Launch the Actor
There are countless ways to run the actor we just created, and if you went through the getting started section, you'll have seen some some of them already. Open your browser to view the web dashboard at http://localhost:4000. If you've configured your host with an alternate port number, use that here.
At this point, simply click Start Actor and then choose From File. Open a browser to your current project directory and then navigate to the build directory. Here you'll find a (project)_s.wasm file, where (project) is hello, or the name you selected for the project. The _s suffix indicates that this WebAssembly module has been signed.
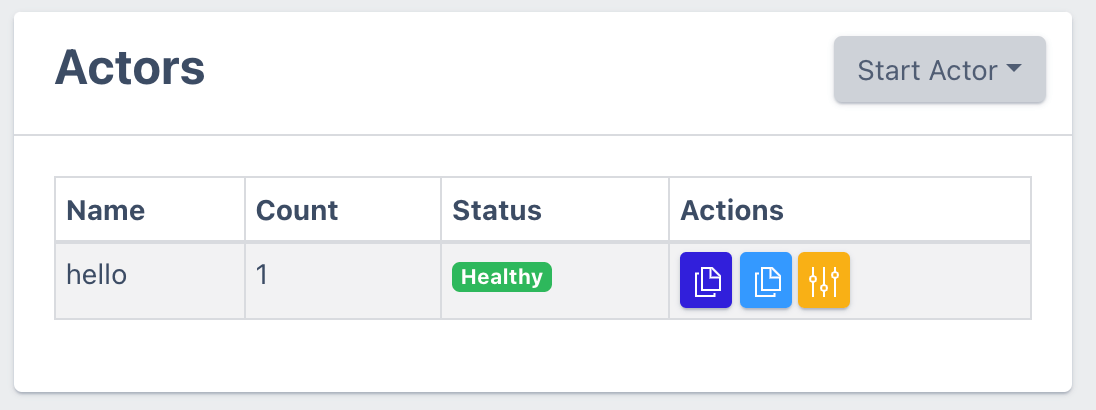
A moment later you should see the actor in your web UI as shown in the following screenshot:

Start the web server
We know our new actor needs a web server, so let's start the HTTP server capability provider. To do that, click the Start Provider button and enter this OCI URL: wasmcloud.azurecr.io/httpserver:0.16.2. Now we should have both an actor and a provider, and the dashboard should look like this:

Add a link definition
With both the provider and the actor running, the next step is to link the two. This provides a set of configuration values that is unique for each actor's use of a provider. To change things up slightly, and so you develop some muscle memory with the command line tooling, we'll use the wash CLI here. To link your actor, you'll' need the actor's public key. You can get that by clicking on the dark blue clipboard icon next to the actor name in the dashboard web UI (it'll be a long string that starts with M).
Once you've got the actor's public key, you can export a HELLO_ACTOR_ID environment variable with that value and copy-and-paste the link command:
- Unix
- Powershell
# Paste your actor ID after the `=` below (with no space after the `=`)
export HELLO_ACTOR_ID=
wash ctl link put ${HELLO_ACTOR_ID} VAG3QITQQ2ODAOWB5TTQSDJ53XK3SHBEIFNK4AYJ5RKAX2UNSCAPHA5M wasmcloud:httpserver address=0.0.0.0:8087
# Paste your actor ID after the `=` below (with a space after the `=`)
$env:HELLO_ACTOR_ID =
wash ctl link put $env:HELLO_ACTOR_ID VAG3QITQQ2ODAOWB5TTQSDJ53XK3SHBEIFNK4AYJ5RKAX2UNSCAPHA5M wasmcloud:httpserver address=0.0.0.0:8087
At this point your HTTP server capability provider has been notified that a link definition was created, and it started the corresponding web server listening on port 8087. You can now hit that endpoint and exercise the code you just wrote:
curl localhost:8087
and you should get the response:
Hello World
The actor accepts an optional parameter name, and uses it to change the greeting. (Notice the quotes around the url below).
curl "localhost:8087?name=Carol"
The response should be
Hello Carol
Congratulations! You've successfully created and run your first actor. Welcome to the world of boilerplate-free, simple distributed application development in the cloud, browser, and everywhere in between.
Let's make a slight modification to the code, so you can see what it's like to go through a development iteration to compile and update the running code. Don't worry - this will be pretty quick.